In order to see the client origination IP address on the real back-end servers when a Barracuda ADC load balancer is used there are two options. The first is to use layer 4 load balancing on the service type. The other option is to use a layer 7 proxy service and enable client impersonation (while setting the default gateway to the ADC – but this causes other problems that I’ve discussed in part 2 of this post). Both of these options work ok for clients outside of the back-end server network, but these do not work if the clients are in the same layer 2 network. (For example if your virtual IP is 10.0.0.5 and the back-end servers are 10.0.0.10, 10.0.0.11 and your client is 10.0.0.100, then neither of these options will work). This is because when the back-end server sees that the IP address is on the same network, it will not send the return packets back through the Barracuda ADC, but rather straight to the client and thus break the TCP stream.
The solution to this is to use a layer 4 TCP service with “Direct Server Return” (DSR) enabled, plus a loopback interface must be added to each of the back-end servers that have the IP address of the service virtual IP (VIP) assigned to them. DSR will cause the ADC to change the data frame’s MAC address to the MAC of the real server before placing the packet back on the wire. The server will accept the packet (bound for the service VIP) because the loopback has been assigned the same IP. The server will then respond back directly to the client using the VIP as the source address.
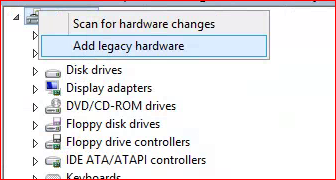
To do this, first go to the device manager and right click the root of the tree and choose “Add Legacy Hardware.”
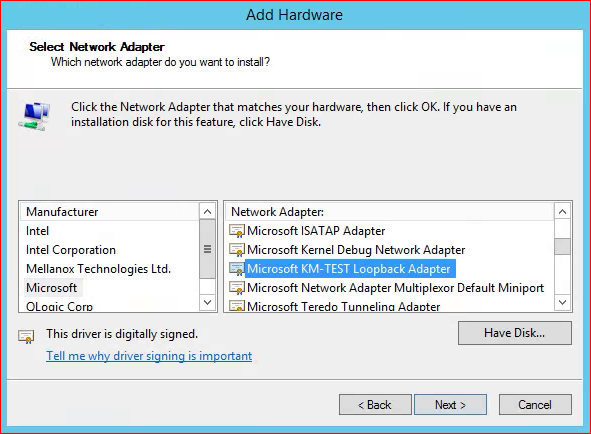
The wizard will begin, click next and then choose “Install the hardware that I manually select from a list.” Then choose “Network Adapters” from the list of common hardware types. Then choose Microsoft in the left pane and “Microsoft KM-Test Loopback Adapter” from the right pane.
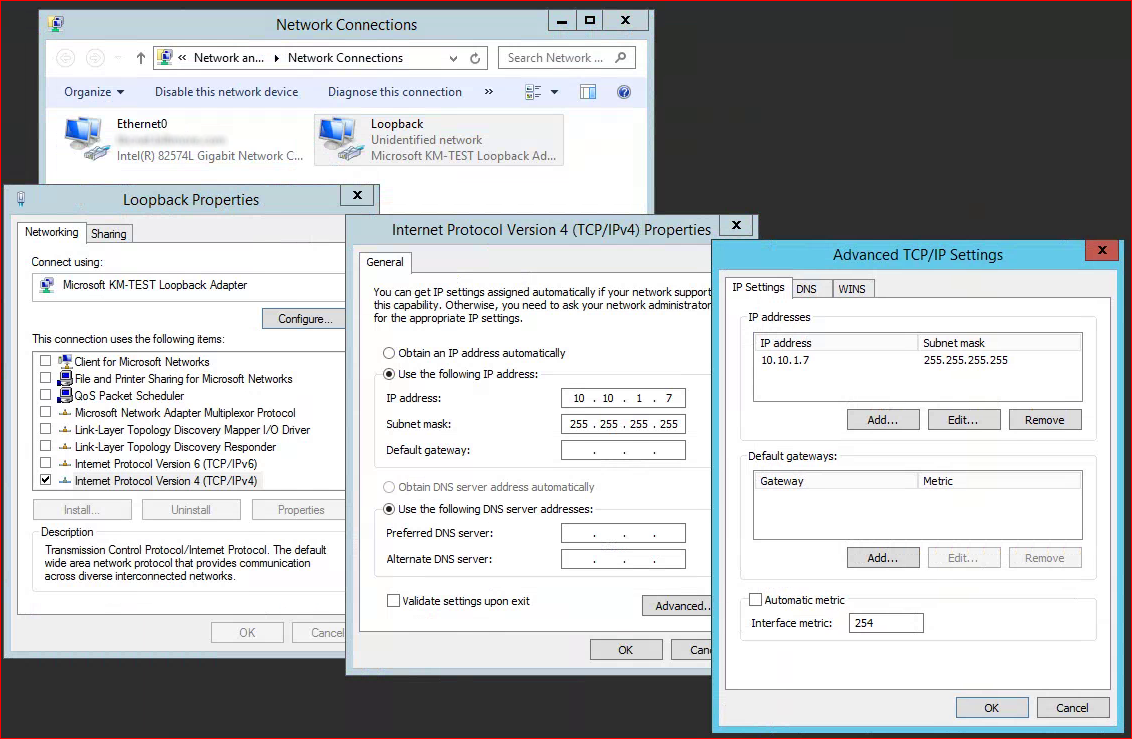
This will create a new loopback NIC, I’d recommend renaming it to something useful like “Loopback”. Right click the NIC and go to properties and uncheck everything except IPV4. Highlight IPV4 and choose properties. Give the loopback the same IP address as the Barracuda ADC service IP address along with a subnet mask, but do not assign a default gateway. Then choose advanced change the interface metric to 254 (this will cause the interface to no participate in ARP and cause duplicate IP issues). On the DNS tab uncheck “Register this connection’s address in DNS.”
Starting with Windows Server 2008, network interfaces will not accept packets for IP addresses that belong to other interfaces, this is known as a “Strong Host Model.” In our case we want the physical NIC to accept packets destined for the service IP that we have configured on the loopback interface. In order to allow this, open up a command prompt with admin credentials and run “netsh interface ipv4 show interfaces” to see a list of the interfaces and IDs:

Then run the following (replacing “12” with your physical NIC ID and “23” with your loopback interface ID)
netsh interface ipv4 set interface 12 weakhostreceive=enabled
netsh interface ipv4 set interface 23 weakhostreceive=enabled
netsh interface ipv4 set interface 23 weakhostsend=enabled
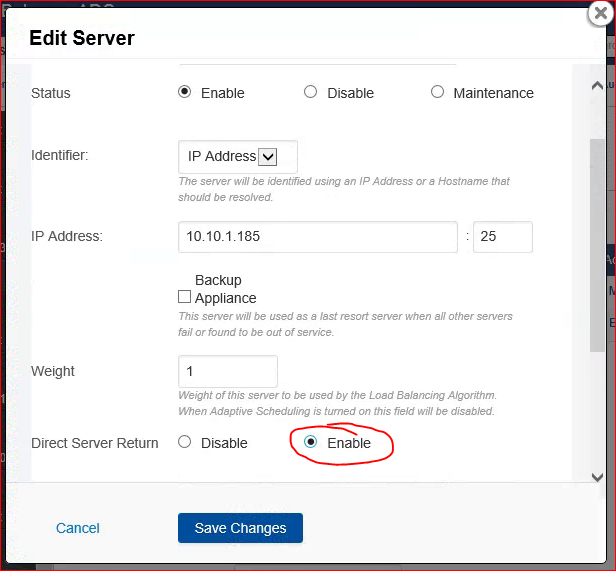
Now go to the ADC and open the Layer 4 TCP service and edit each of the configured servers and enable “Direct Server Return.”
You should now be able to see the origination IP addresses of your clients (from all networks including the local network) on the back-end server instead of a proxy IP address from the ADC.
To learn more about getting a layer 7 proxy service to work when the ADC is multi-homed see part 2 of this post.